 TileOptimizer
The decision
What does the tile starting point change?
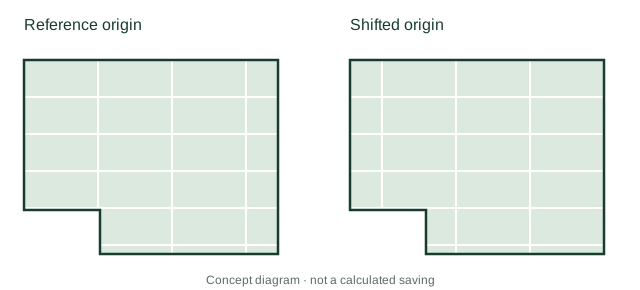
A room-corner start is a useful reference. It is also only one position for the repeating pattern. Move that pattern across the same measured floor and it meets the entry, returns and opposite walls differently. A full tile at the first wall can leave an awkward strip somewhere more visible.
The opportunity is to compare these consequences on a drawing while changing the start costs almost nothing. This applies to straight-set, offset and herringbone layouts; each has its own repeating pattern and perimeter cuts.
Compare first. Mark out second.
Draw the actual tileable area.
Include returns and recesses. Exclude fixed joinery and zones that will not receive this tile. Keep connected areas together only where the pattern really continues.
Lock the job inputs.
Use the same tile dimensions, laying pattern, orientation, floor boundary and offcut-reuse setting for every starting point. Otherwise you are comparing more than the origin.
Calculate a reference and alternatives.
Compare new tile units, cut operations and remaining material. Then put your own tile price and crew assumptions against the results.
Choose a buildable set-out.
Inspect the actual edge shapes and carry the preferred option back to the site. Record the agreed datum and verify the first rows before fixing tiles.
The cheapest model still has to look right.
A lower tile count is not permission to accept an impractical sliver. Check the entrance, long sightline, exposed edges and transitions before accepting a candidate. The model does not know which edge your client will notice first.
Doorways and returns
Inspect the pieces at the threshold and at the turn into the main room.
Visible perimeter
Check edge sizes, visual balance and cuts that your equipment can make reliably.
Measured reality
Recheck wall positions and installed module dimensions. Account for joints, tolerances and site details outside the model.
Give the crew a decision, not a guess.
Keep the accepted outline, tile specification, orientation and starting reference together. If a boundary or tile changes, recalculate before relying on the old count. A precomputed origin is a planning aid that should be checked against a dry set-out on site.
Across ten apartment-plan simulations, a Sydney-priced comparison put a dollar value on the difference between a room-corner start and a calculated alternative. Compare material and cutting costs across ten modelled plans →
Practical questions
Should I start tiling in the centre or at a wall?
Use both as possible references. Compare the resulting cuts at opposite walls, thresholds and other visible edges. A full tile at one wall is not enough to establish that the entire layout is preferable.
Where should a herringbone starting point be measured from?
Use a recorded datum and the agreed pattern direction. Compare translations of the same pattern against the floor boundary. Keep orientation fixed while testing the origin, so you can see what the position alone changes.
Does the lowest tile count determine the best starting point?
No. A low count can still leave fragile pieces or an unsuitable transition. Inspect the perimeter and then compare material and cutting costs before accepting the set-out.
Check the calculation definitions, verification method and limits behind these comparisons.